

This shot from the 911UK meet on Wednesday is as much about that sky as it is about the classic 993. To me this is how it looked when i was there, but it’ll come as no surprise that the original shot from the camera liked somewhat lacklustre in comparison. Your options for lighting are somewhat limited to the single Speedlite on the camera when at an event like this, which is where the importance of shooting RAW comes in.
When i took the shot I knew that the sky would overexpose, but so long as i had that under control and didn’t blow out the highlights, the details would be captured in that RAW data. Why is this important? How can you get to that data and show the image that you’re own eyes saw? Say hello to Lightroom, the photographer’s best friend.

Here’s the original. From my first view the plan for the edit was clear; make the basic adjustments to the whole image exposure, then select the sky and apply a separate set of adjustments to it. First to the core adjustments. My normal tweaks are too drop highlights, bump shadow detail, lighten the whites, darken the blacks and add a smidge of clarity. If exposure and saturating need increasing this is when I’ll do that.
Now we have the lower half of the image looking how we wanted, but that sky……..let’s fix it.
Select the brush tool and make sure the masked area is indicated. Carefully select the whole sky, using your scroll wheel on the mouse to increase and reduce the brush size when you need to get those tighter spots between the tips of the trees.


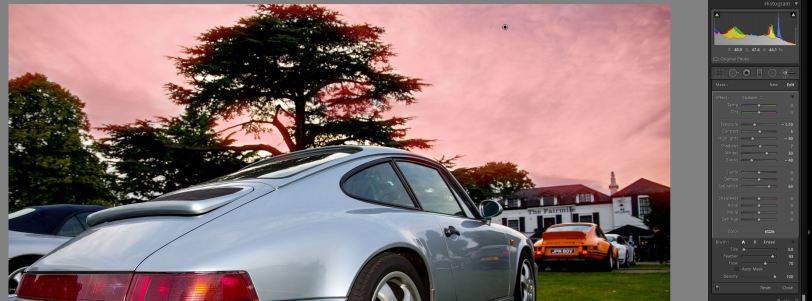
Now that we have the area select it’s time to make the adjustments. We want to change three things here. (1) reduce the exposure, (2) reduce the highlights to reveal the cloud details (3) increase the saturation so that blue sky isn’t lost.
And there you have it. From flat to punchy in just a handful of easy steps.
There are other ways to do this, both in Lightroom and Photoshop. In Lightroom rather than using the brush selector you could apply a graduated filter instead. The reason i haven’t here is because that would catch the tree tops and applied the filter to those too. That’s what I did originally and you can see that image in my post from yesterday. You’ll see how the filter has caught the top of the large tree in the centre of the sky.
The other way in Photoshop is to create a duplicate later, so that you have 2 copies of the image on separate layers. You then adjust one to expose the foreground correctly, expose the second to get that moody sky and then apply a layer mask and selection to combine the best bits of both layers to get the final composite image.
Hopefully that’s useful you some of you and will help you to look at some images you’ve taken and see how you can create something more powerful with just a little work.
